Results 1 to 14 of 14

Thread: 3gee restoration pics

  1. #1

    3gee restoration pics


    More engine pics here -> http://www.cardomain.com/ride/758889/6
    other pics here -> http://www.cardomain.com/ride/758889/7

    I rebuilt the engine and its ready to go in the car but I still have to put the suspension parts in but the rain won't go away.
    Honda piston rings and bearings
    act street/strip clutch
    new seals
    a much needed cleanup and paint
    I still need a water pump pulley, I forgot that I threw mine out (it was warped) and the valve seals need changing but my spring compressor doesn't work on this motor... I can always change them in the car...

    More pics tomorrow of my other junk!
    Last edited by POS carb; 12-26-2006 at 09:45 AM.
    Eric
    3geez member since October 12, 2000
    "All this worldly wisdom was once the unamiable heresy of some wise man." - Henry David Thoreau


  2. #2
    3Geez Veteran MessyHonda's Avatar
    Join Date
    Feb 2006
    Vehicle
    89 LX-i(5speed)
    Location
    Bay Area
    Posts
    22,201

    Re: 3gee restoration pics

    looking good. nice and cheap rebuild.

    1989 Honda Accord LX-i
    B18c1 swap since 7/2011
    175whp and 132tq
    Redzone tuned

  3. #3
    2.0Si User
    Join Date
    May 2004
    Vehicle
    1988 Accord DX
    Location
    SEMO
    Posts
    3,510

    Re: 3gee restoration pics

    Good job. Looks like a Mustang in the back yard too.
    .

  4. #4
    2ndGenGuy
    Guest

    Re: 3gee restoration pics

    Great job! Engine looks great. Leather looks cush too!

    Dude, I gotta give bonus-props for the ES2 valve cover! Or did that valve cover come on other Accords too?

  5. #5

    carotman's Avatar
    Join Date
    Jul 2000
    Vehicle
    89 Accord LX/B20A | 87 Accord Hatch "S" Stock | 94 Civic Hatch CX
    Location
    Montreal South Shore
    Posts
    9,984

    Re: 3gee restoration pics

    Nice build!

    What crank bearings did you use?

    http://pages.videotron.com/omus
    3geez member since July 12 2000

    I need these parts!
    https://www.3geez.com/forum/showthread.php?t=67742

  6. #6
    3Geez Veteran lostforawhile's Avatar
    Join Date
    Dec 2002
    Vehicle
    86 hatchback, 1990 Lincoln Towncar
    Location
    nowhere GA
    Posts
    15,401

    Re: 3gee restoration pics

    Quote Originally Posted by POS carb

    More engine pics here -> http://www.cardomain.com/ride/758889/6
    other pics here -> http://www.cardomain.com/ride/758889/8
    It's late and I'm tired of fighting with the cardomain site. page 7 is stuck in some editing abyss so its blank, I can't fix it
    I rebuilt the engine and its ready to go in the car but I still have to put the suspension parts in but the rain won't go away.
    Honda piston rings and bearings
    act street/strip clutch
    new seals
    a much needed cleanup and paint
    I still need a water pump pulley, I forgot that I threw mine out (it was warped) and the valve seals need changing but my spring compressor doesn't work on this motor... I can always change them in the car...
    More pics tomorrow of my other junk!
    how did you get the old center cap to stay on the pulley? I have one just like that around here somewhere. I had a couple of ideas like that.

  7. #7

    Re: 3gee restoration pics

    hola, que tal

    ty for the props

    The car in the back is my 66 Mustang GT, it has been taking me to and from work since February. 289 4-bbl, 3-speed auto, with Power steering (leaks). This car is a GT but it did not get many other options (like Pony interior or A/C, etc). I've had to rewire everything under the hood, change the alt, water pumkp, radiator, head gaskets, ignition system, fuel pump. I also had to replace the bearings in the rear end. I love the V8 RWD feeling. The MB Quart 15's and amps that were in the trunk are going in the 3gee so I will probably drop in my old JL box.
    I'll post some pics tonight in "Off Topic"

    about the A20
    pistons on my engine were damaged b/c the first time I ever did engine work I somehow dropped something in the intake and it got sucked into the engine and it hammered up my rebuilt head and pistons pretty bad. I knew I had a problem right away but I never expected that. Crushed spark plugs and little melted metal blobs in my cylinders, ouch.

    the rings are from Honda std size
    the bearings are also from honda, all "black"...
    I couldn't figure out the colors from the original bearings, most looked black, some on the rods looked green. fk it.

    the valve cover is from an 84 or 85, I pulled it from a junker in California a few years ago and stripped it down. mine came with some cheap stamped metal thing. this one is solid aluminum.

    the leather interior is a combination of SEi doorpanels with the top parts from an LXi and the seats are from an old 700 series Volvo sedan. They're a little bit big but really comfortable. The controls are hard to get to on the passenger seat, it has one of those stupid knob-style recliners that you have to spin.

    The H hubcap snaps right into the alternator, no glue required.

    I have the LXi brakes too but I want to change the wheelbearings on the LXi arms before I install them and I don't have a snap ring tool. also one side of the bearing is stuck on the hub so I need to cut it off and then the bearings need to be popped in and out (which is a bitch to do when you don't have a press)
    The balljoints I was able to change with a sledgehammer, a socket, a flathead screwdriver, and two vise grips for the snapring.

    this thing is a money pit, I still need to buy:
    front wheel bearings
    front upper balljoints
    rear rotors
    water pump pulley
    4 tires
    alignment
    ignition coil
    windshield is cracked (like an upside-down "T", pretty big crack)
    dashboard and driver's door trim panel (later)

    pretty much everything else is purchased and needs installing
    new LXi rotors and calipers with ceramic pads
    new lower control arms and bushings
    new sway bar bushings
    new lower ball joints
    new rear brake pads
    new Newspeed spings and tokico shocks
    new HIDs (GE 6000Ks and Hella Audi-style balasts)
    junkyard doorpanels
    TV and DVD player
    mount and wire up my amps
    install headliner and trim
    install HIDs

    I can't wait!!
    Eric
    3geez member since October 12, 2000
    "All this worldly wisdom was once the unamiable heresy of some wise man." - Henry David Thoreau

  8. #8

    Cheeseburger's Avatar
    Join Date
    Apr 2003
    Vehicle
    1989 honda accord Lx ( cheeseburger mobile) 1989 honda accord Lx-i ole blue
    Location
    Los Angeles
    Posts
    3,355

    Re: 3gee restoration pics

    good to hear that u still have the accord man!

  9. #9

    carotman's Avatar
    Join Date
    Jul 2000
    Vehicle
    89 Accord LX/B20A | 87 Accord Hatch "S" Stock | 94 Civic Hatch CX
    Location
    Montreal South Shore
    Posts
    9,984

    Re: 3gee restoration pics

    Well, the bearings have to be the exact size or you may end up with problems in the future. There is a chart on the engine where you can identify the bearing colors.

    http://pages.videotron.com/omus
    3geez member since July 12 2000

    I need these parts!
    https://www.3geez.com/forum/showthread.php?t=67742

  10. #10

    Re: 3gee restoration pics

    the damn camera didn't want to cooperate with me so I was only able to grab about 4 pics... I replaced the front wheel bearings in the LXi arms so now it is all new... Balljoints, rotors, and calipers are mounted on the arms.

    I removed the axle and suspension on the driver's side, mounted the new lower control arm and new strut. waiting to drop the engine this Sat when there is some daylight and no rain...
    It was freezing here, like 50 degrees 
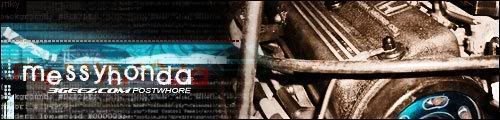
whatever, it'll be more like 60 or 70 tonight. tonight I'll mount up the passenger side suspension and hopefully install the rear struts and brakes. I'll put some fresh pics up.

    Saturday should see the engine in place and ready to go (but I have to go grab a junkyard water pump pulley first!)


    To remove the balljoint you'll need a snap ring tool, a large socket (~30mm) and a large hammer. Remove the dust ring from the rear of the hub with a flat screwdriver and hammer. After that's off, you can move on to removing the snap ring from the bottom of the balljoint. Then you can smash the balljoint out by the stem with the hammer. grease the new one and gently tap it in to place, make sure it's centered, then give it a few good whacks until the snap ring ridge is visible on the bottom. The toughest part will be balancing the arm on something while you bang.

    The wheel bearings are similar, to get the hub out I used the old ball joint, centered it on the rear of the hub, and banged away. Once the hub is out you can access the snap ring in the front and remove it. Hammer the balljoint from the rear out through the front of the arm. A large socket would be helpful, but most people won;t have one large enough. I tried the wheel of an old jack but it shattered. I ended up using the minisledge. THe front half of the bearing was stuck to the hub (both sides, this is almost inevitable). You'll know for sure if you can see the ball bearings. With my dremel and a metal cutoff wheel I made two cuts in the piece stuck to the hub, 180* apart and split it with a chisel. don't worry if you cut the hub a tiny bit. Lube the walls where the bearing rests and hammer it in with a large flat piece of wood and a heavy hammer. You can also use the old bearing, helpful for the final seating (the bearing rests lower than the edge of the arm)

    seating the snap ring is tricky, set one side by hand and "curl" the other end of it into place. this is difficult, you may need an assistant with a flathead and small hammer to help it in.


    To hammer the hub in, lube it and center it in place, give it a few soft hits so it stays in place and flip the arm over so it is resting on the hub. Hammer on the center ring of the bearing from the rear (I used one of the bearing pieces I cut but didn't have to split). If you try to hammer the hub head on you will pop the center out of the rear. I can't think of any other way to do this without a press.

    enjoy, hope that helps someone.
    Eric
    3geez member since October 12, 2000
    "All this worldly wisdom was once the unamiable heresy of some wise man." - Henry David Thoreau

  11. #11

    race12001's Avatar
    Join Date
    Dec 2005
    Vehicle
    1989 Honda Accord LX-i
    Location
    Sanford NC
    Posts
    1,018

    Re: 3gee restoration pics

    looks good i wished i had your patiance to do this

    took a whole year but i got the 100th post
    yet only took a month to get the 200th
    Dec. 05-Dec. 06
    Quote Originally Posted by forrest89sei
    CAH pops rice-a-roni in his pants!


  12. #12


    Join Date
    Jul 2000
    Vehicle
    2000 Audi S4 Twin Turbo/ 2007 Honda Fit Sport/ 2010 Ford Flex Limited
    Location
    Temecula, CA
    Posts
    2,290

    Re: 3gee restoration pics

    WOW POS Carb--didn't know you were still around...


    1-11-2014 Dyno Day
    587 - AWHP
    454.6 -TQ
    http://youtu.be/TqCtTbjQqFg

    www.tvme.info

  13. #13

    Cheeseburger's Avatar
    Join Date
    Apr 2003
    Vehicle
    1989 honda accord Lx ( cheeseburger mobile) 1989 honda accord Lx-i ole blue
    Location
    Los Angeles
    Posts
    3,355

    Re: 3gee restoration pics

    more pics!!!!!!
    this pic is just money!

  14. #14

    Re: 3gee restoration pics

    some new pics are up of the suspension work, I might put in some work tonight, depends how trashed I get,,, happy friday!
    oh and the Mustang pics are in OFF TOPIC now

    here is an LX vs LXi shot


    I found my old burnout pic


    hehehe
    Eric
    3geez member since October 12, 2000
    "All this worldly wisdom was once the unamiable heresy of some wise man." - Henry David Thoreau

Similar Threads

  1. Thyfire’s 1Geen Restoration - Lots of pics
    By Thyfire in forum 1geez Accords
    Replies: 156
    Last Post: 04-27-2010, 05:08 AM
  2. labeledsk8rs 3gee's last pics before the JY
    By labeledsk8r in forum Classic Honda Pics & Videos
    Replies: 27
    Last Post: 12-04-2007, 03:34 PM
  3. few pics of my 3gee
    By A18A in forum Classic Honda Pics & Videos
    Replies: 19
    Last Post: 06-20-2007, 08:38 PM
  4. JDM 1981 3dr HB GX Restoration Pics (56K? might be OK)
    By epic1400cs in forum 1geez Accords
    Replies: 36
    Last Post: 12-22-2006, 04:23 PM
  5. h22 in 3gee, couple new pics!
    By adams86lxi in forum Classic Honda Pics & Videos
    Replies: 13
    Last Post: 07-16-2006, 02:19 PM

Bookmarks

Bookmarks

Posting Permissions

  • You may not post new threads
  • You may not post replies
  • You may not post attachments
  • You may not edit your posts
  •  
This website uses cookies
We use cookies to store session information to facilitate remembering your login information, to allow you to save website preferences, to personalise content and ads, to provide social media features and to analyse our traffic. We also share information about your use of our site with our social media, advertising and analytics partners.
     
Links monetized by VigLink