
wow that is one of the cleanest interiors i have seen, really good work. im not really digging the momo though.


wow that is one of the cleanest interiors i have seen, really good work. im not really digging the momo though.
thanks mkymonkey
Car looks great man! I think we drove past each other about a week ago and you had that "WTF is that right hand drive?" look on your face...
lol that classic look, I look at people like that when they are driving a RHD car around here.Originally Posted by jonrichert


Haha jon, I was looking like that because I thought you might of already sold your car so I was like whos this joker!
We should meet up if your still in town.
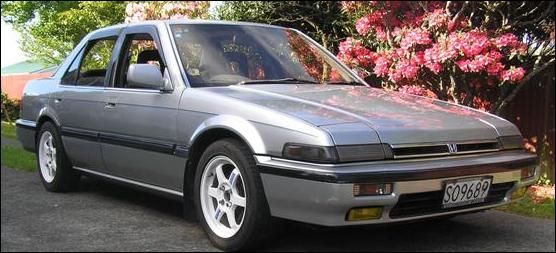
i would just like to repeat I'm so insanely jealous of this car. Oh if I didn't have two kids and a jumbo mortgage to support.
-Mark D.
Brings a tear to my eye...
Well in lue of the new year and this being overdue I though I would make my mod list for my garage space, which I should be getting soon.
:edit:
I deleted the list and put it into my "garage" page, here's the link for that instead.
my garage page
:edit:
I think thats all for now, probably edit it later on heh. Just went through the thread again and damn, I want to get started right away on getting this thing running good and some more mods!
Thanks for the comments guys.
Last edited by 87roach; 02-08-2009 at 07:56 AM. Reason: update link
I had the same issue when I installed my seats as well. I just had to put some "grunt" on it. That's why I put in the "helpfull tip" at the bottom.
Helpfull tip: bolt down the seat slider next to the door first. If ya gotta do any pushing on the sliders to line up the bolt holes, it's easier to push on the seat from outside the car, than it is to push on a slide bracket from inside the car toward the doors.
After I did mine, I checked the seat movement to see if they got bound up, or anything like that, but there are no problems with mine as far as I've been able to tell.
I did both front bolts first (left 'em loose), then the rear bolt next to the door (loose as well), then used my foot/leg to shove the last seat rail into position while my son put the bolt on. Then just tightened everything up.
On second look, your seat rails seem to be wider at the rear than the stock seat rail positions ... mine were narrower and the inner rail had to be shoved toward the tunnel. Perhaps there is some leeway dependant on how ya bolt the tracks to the bottom of the seat that would make up for this difference.
Last edited by Bones; 01-28-2009 at 06:47 PM.
Damn, I havent checked in on this thread in a long time. Car is looking fantastic roach, nice progress you have made. I love the interior especially turned out great.
My Project thread https://www.3geez.com/forum/project-c...dan-build.html
My Flickr: http://www.flickr.com/photos/jdmca5/
Thanks Hash I want to see some new pics from you sometime eh!
Bones, I think your tip worked for you because from what I can tell that rear mount point is different in my 87 vs the 89 parts car. Thus you were able to squeeze it on there, I think I might just fab something up so that I can get the bolt in without any extra stress on the rail.. I don't mind being stuck with these seats!
if i could have any hatch...it would be yours....i love the dedication. i cant wait to put on my prelude seats
1989 Honda Accord LX-i
B18c1 swap since 7/2011
175whp and 132tq
Redzone tuned
Thats so nice once again...thats great work. i just got lude seats and steering wheel today for 70 lol...just NOW. but great job man.
200+ ALL MOTOR LS VTEC
i just decided to read your whole thread from start to finish, you have done so much work on this car, more than i have done to mine even, good work man
Thank you. Thank you.
Rendon, you'll be happy with the new seats!
AccordB20A, I thought it was just me who did that! Haha, thanks. Good luck with the rebuild btw!
:edit:
Oh, I deleted that mod list on this page and put it into my garage space, so if anyone's wondering that's where it went.
:edit:
Now thats a nice thred. Thanks for yor time and sharing with us all your work. Lokss awsome
Thanks! Can't wait till it gets nice out so I can get back to driving...

Awesome project! Have you driven the car after installing all of that b-quiet stuff?
I'm curious how much sound deadening it will actually create.
I have that same rear muffler, is yours annoyingly loud as well?
It's funny, the color that you had your valve cover turn out by mistake is a lot like the color that I was considering to use for my brake calipers.
Do you think it will be possible to reproduce that color outcome if I get VHT gold caliper paint and VHT clearcoat or was it some crazy coincidence that wont be possible to do again?
bro, your car is rice....
NOT! hella tight ride bro! super clean!
one day I'll return.
Thank you.
Yes, I put over 1000km before I parked it in november(I think). As for the b-quiet, yes it did a lot! Like you say though the muffler is loud. You can definitely tell the difference from before putting it in and after. The only thing is that the exhaust is loud at higher rpm's(3k+) and is sort of like a drone.. I can deal with it but I honestly thought it would get rid of it. Then again that exhaust is really loud so I can see why.
About the paint.. oy oy well, it was a crazy turnout but I want to try to redo it again. Due to the nature of the circumstances I cannot say it would be possible to get the exact same turnout but you could get something close with some trial and error I bet. Once I try it again I will post up what I come up with, with that spare valve cover.. although I have a diff paint job in mind this time.
Thanks 86ccord!
Heya, well yesterday and today my friend and I tackled the inner tie rods and outer aswell. It was a two part due to the way the left side was in there.. had to lower the rack a bit(thank god for manual) and bend a wrench so that it would fit in there and undo it. All that done, just have to get it aligned now and I'm good to go. Also today, installed my recently recieved pacesetter short throw shiter woooo. While that was out I painted the bare pipe of my exhaust black, just to somewhat slow the rusting process. Hmm what else.. some other things to tackle and clean, found mice poops on my nice VC and other various places! grrr! So I have to clean all that up, vaccum and fresh wash so everything will be nice and clean. Sorry no pics I honestly don't know where the camera is... I think my bud has one so I can snap some tomorrow!
Shit man good to hear...i want pics damnit lol
200+ ALL MOTOR LS VTEC

x2!!!!
everytime I see this car, I get a pit in my stomach because of how it reminds me so much of my car when it was in it's glory. I've said it a millions times before and I'll say it again... ...to all of those interested in restoring or tastefully upgrading their car and keeping it clean, this hatch is the poster-child for that goal.
Very very very nice. (Don't worry, I'm still working on that little secret I've been talking to you about. I expect to have an answer soon enough. Just take it easy on the streets with it for the time being and you'll be just fine.)
-Mark D.
Thank you thank you, mark your too much.
Well, day 3 and still no pics(buddies is apparently off being repaired, bla) anyway. Got the exhaust back on, it leaks on the left side where the mani attaches to the dp and it's already tight as it will go. Crank seal appears to be leaking on the pulley side, the right axel seal leaks(damage from taking axel out). Oh the short shifter is in and wow, seriously almost don't have to move the damn thing to shift so sweet! Had to bang out the heatshield because I pretty much maxed the adjustment out and it was hitting the top. Got the rims back on, ready for alignment sometime soon when money appears.
Oh and to take the cake, I fired her up.. only took a couple cranks and bam! I was pissed about that lopey idle so as it was warming up I cracked open the bleeder and it came out constant. Oh wait then I was like oh I don't know if the heaters open. So I open it and turn on the fan and hear all this shit blowing about in the ducts and it reaks of mice shit and piss and possibly even some dead. I don't know if the idle is fixed but I am right fucking pissed about having to pull the dash and heater out to clean it AGAIN because of some god damn mice. ah shit I just wanted to drive.
The shop is in a real shit show and I need to organize it. Glad to hear your keeping on it mark, Im still waiting so let me know.
Well after having to take out the dash(ugh), there was a big nest above the blower.... so I washed everything and vaccumed and all that crap. It's all back together but I can sorta still smell it on some settings, I hope it will just air out and go away because I hate the fact that my new cabin was defiled.
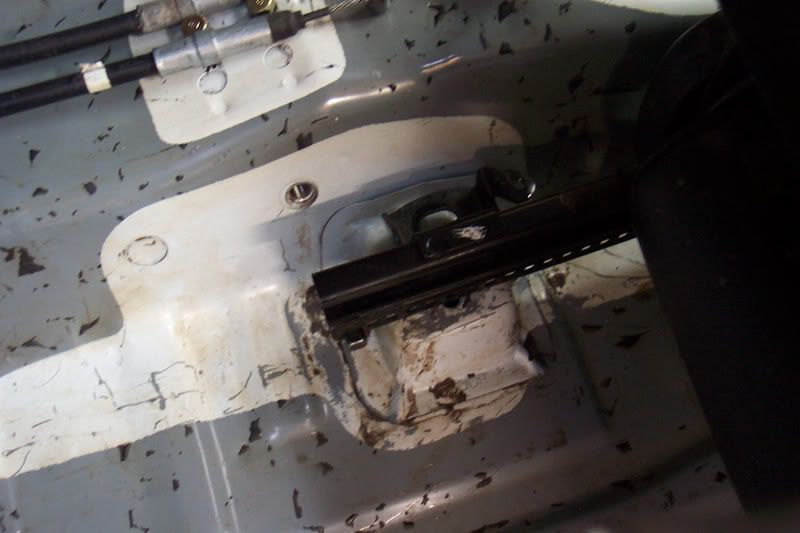
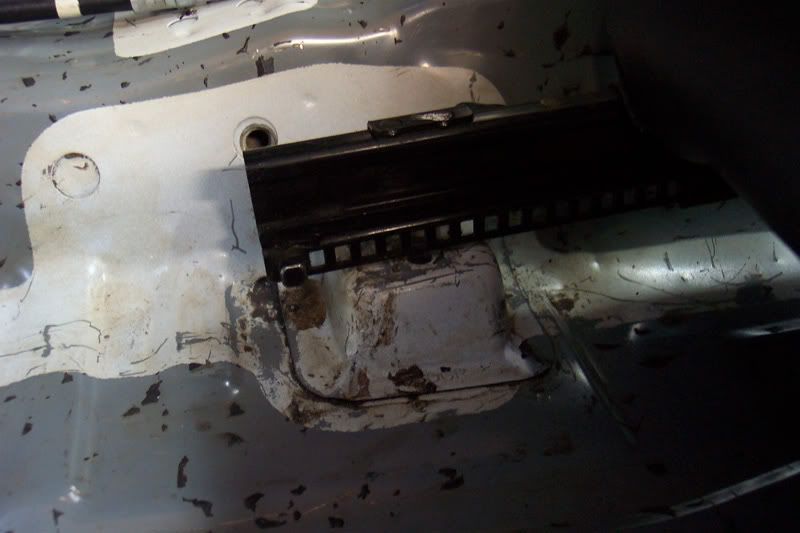
Anyway got some pics! (these were snapped from video, a how-to video that should be up sometime and I will add the link)
Have to jack it up from the side first to get the big jack in the front due to the lip.
End out.
Wrench on, difficult spot..
Washer crimped down.
Washer hammered flat.

Last edited by 87roach; 04-22-2009 at 11:45 AM.
 Posting Permissions


 Reply With Quote


Bookmarks