


Completely updated, 1/1/2019.
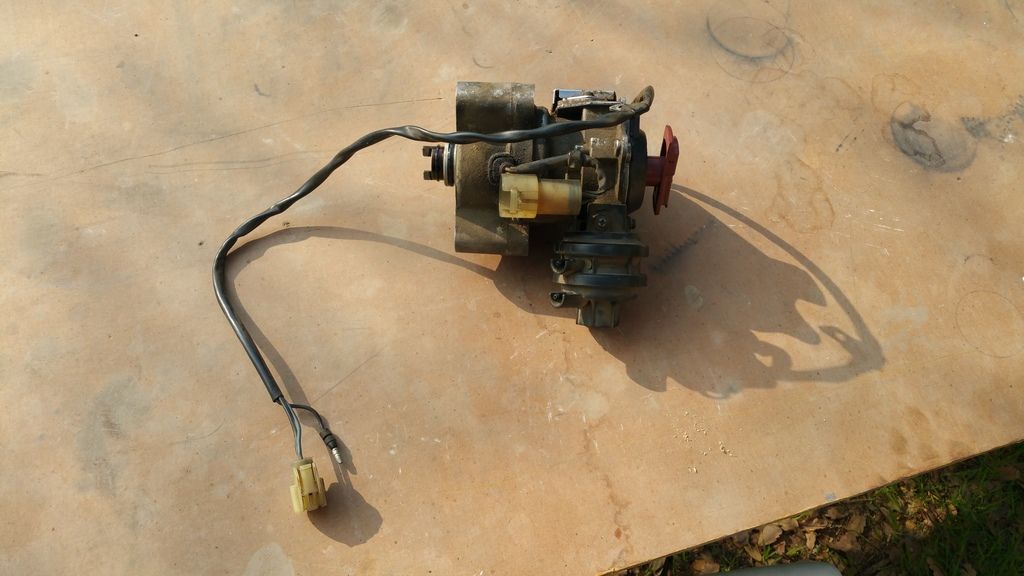
Below is a very targeted, very simple procedure for addressing the two highest wear items in the TEC distributors. These two items can spawn a myriad of odd problems and are among the first things to fail in these distributors. If your dizzie is completely shot, full of oil, red dust, etc., then this isn't for you. You need to buy a new one. If, however, you are starting to get symptoms of failure from an otherwise good dizzie, try this first. Symptoms include wild tach hopping and, in my case, a very strange electrical cut-out while cranking.
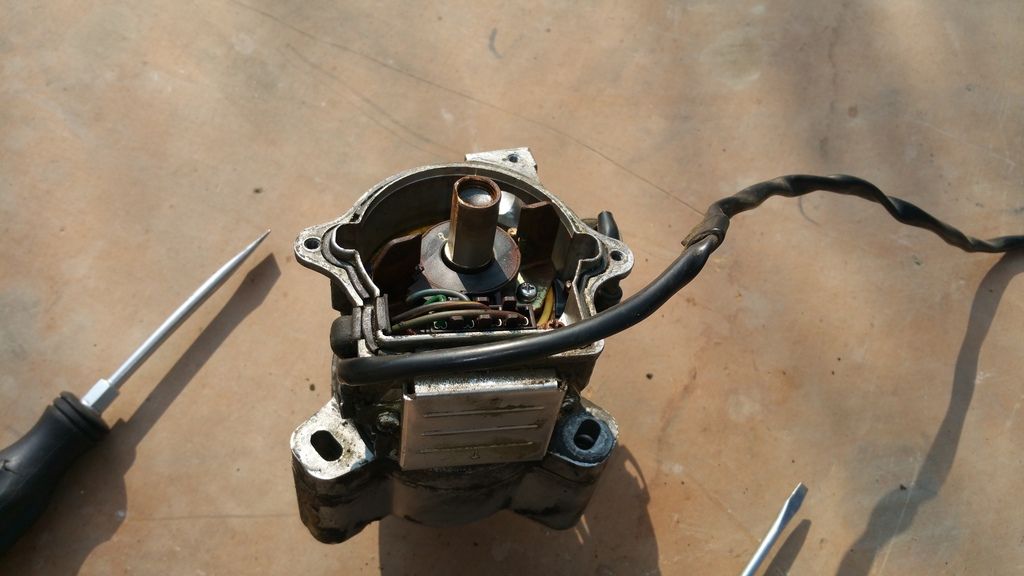
1. Remove the distributor.
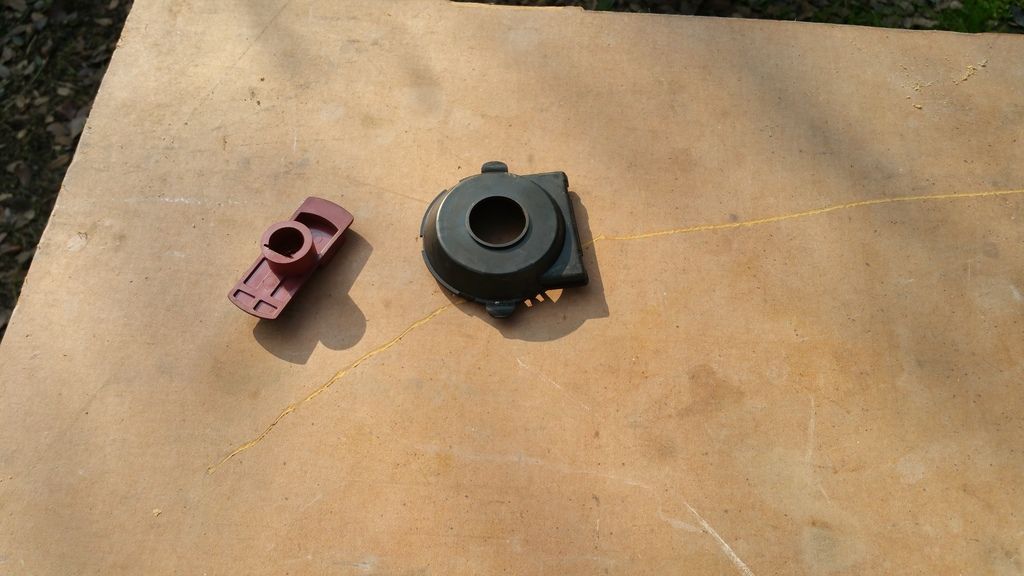
2. Remove the rotor and plastic cover underneath it.
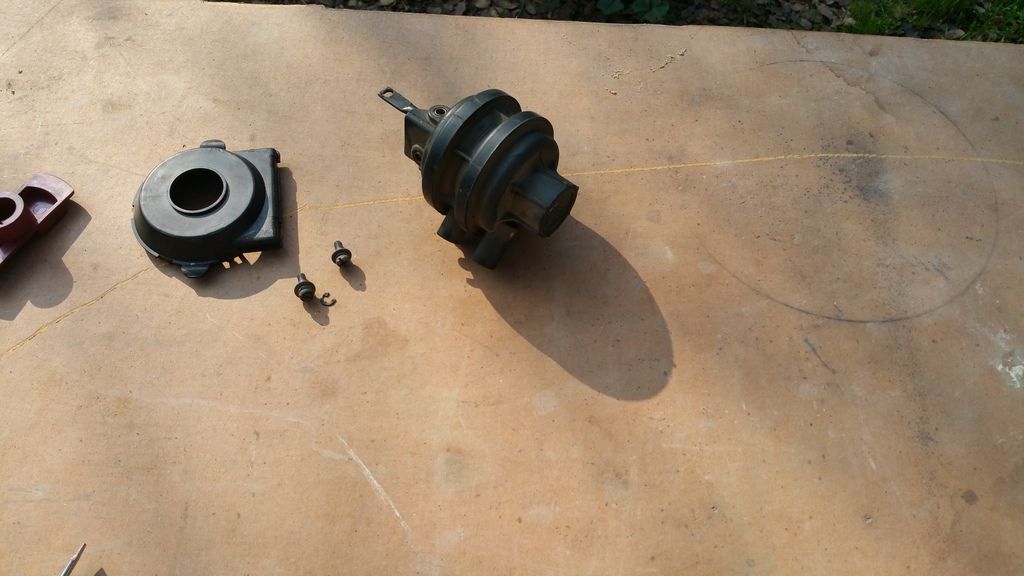
3. Remove the e-clip on the vacuum advance arm. It's a jumpy critter and will want to fly off into the grass where you'll never find it. Take great care to keep track of it.
4. Remove the 2 screws and then the vacuum advance pot.
5. Using a couple screwdrivers, gently pry off the reluctor. It's soft and you don't want to chip the ears.
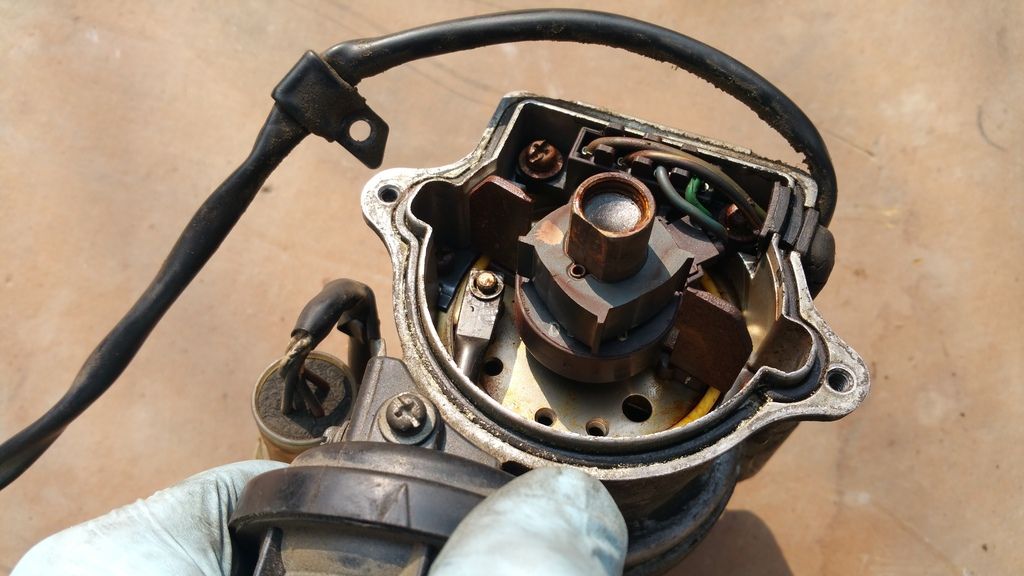
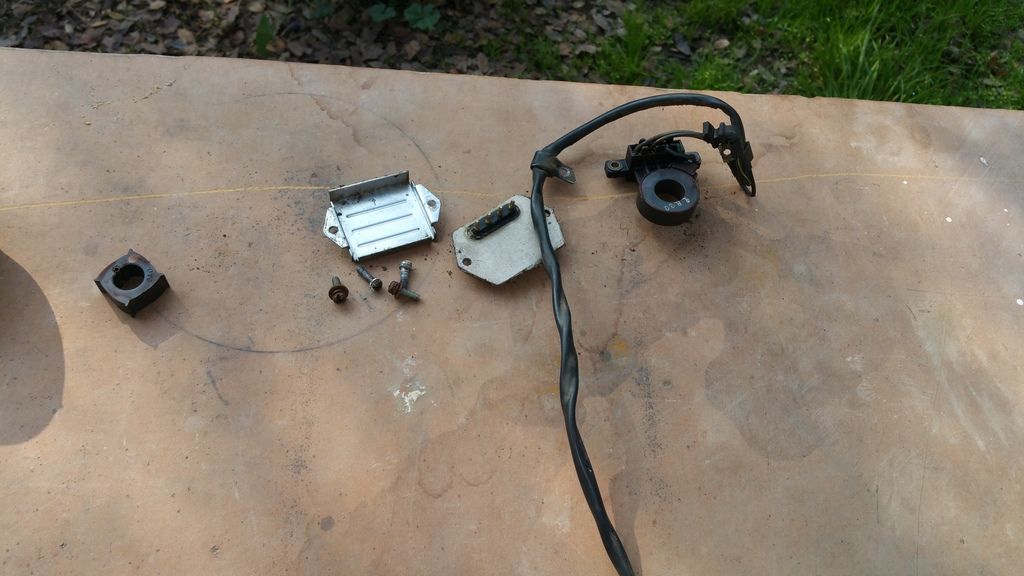
6. Two screws hold the ICM (the silver block on the side of the distributor) and another 2 hold the pickup coil (that bundle of wires inside the distributor below). Remove the screws and remove the ICM and pickup coil. Be careful not to flex the wires more than you have to. The insulation on mine is starting to split from age and hardness.
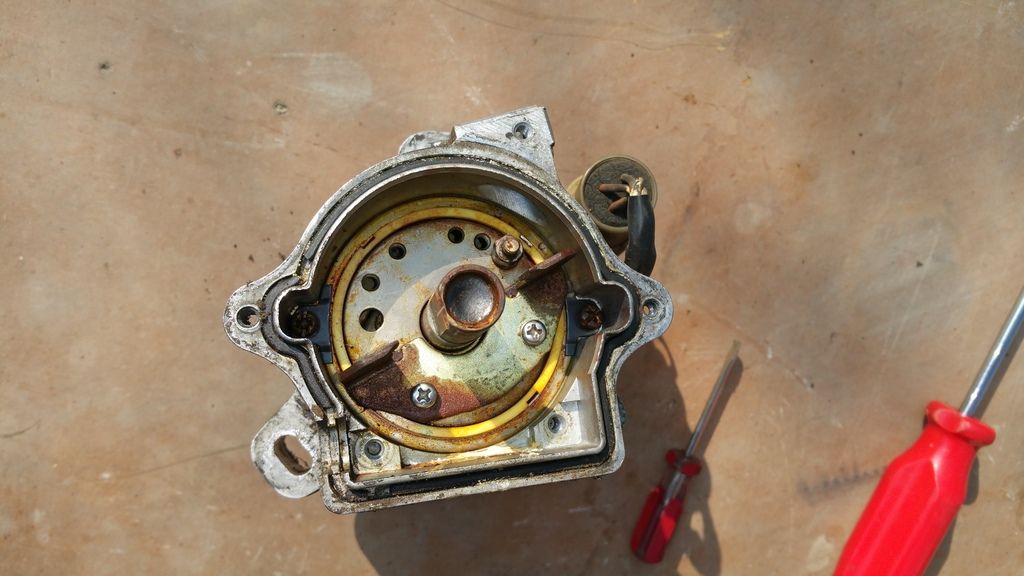
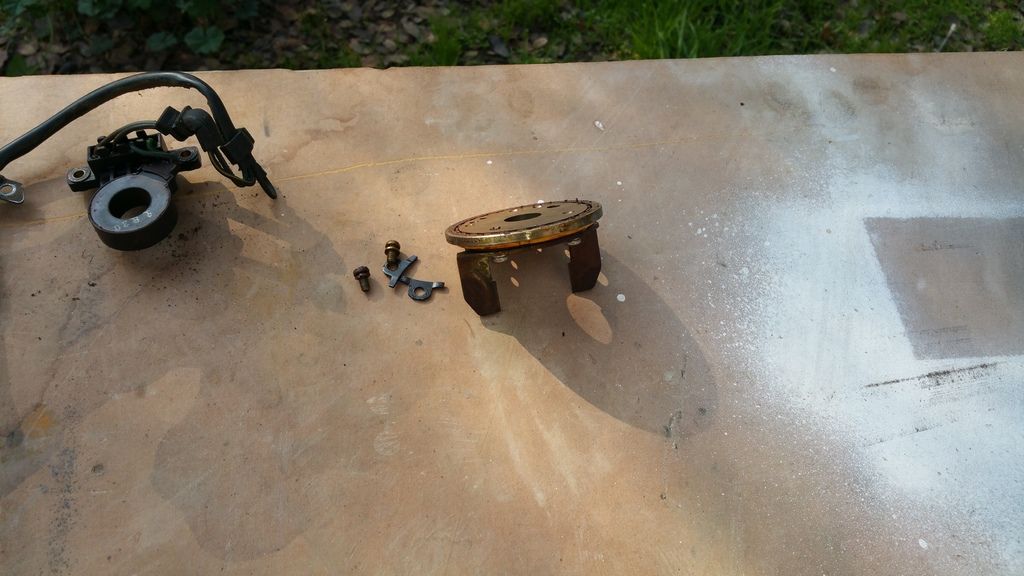
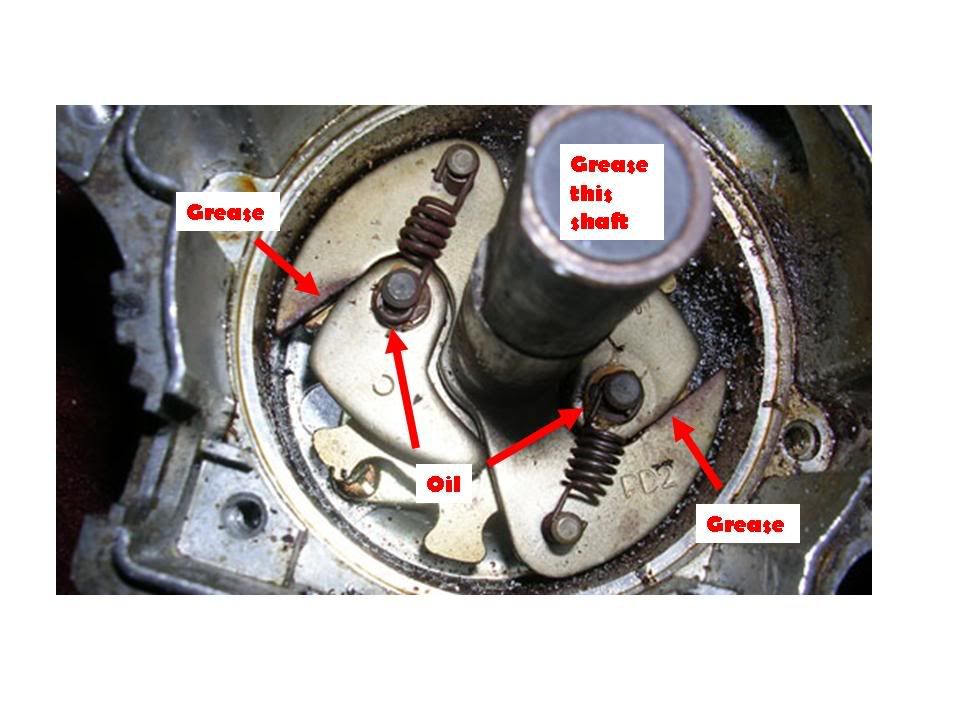
7. Remove the two screws holding the vacuum advance plate, then CAREFULLY pry out the plate. Put a small screwdriver in one of the little holes in the plate and gently wiggle it back and forth until it pops out. Remember, everything in this distributor is 30 years old and parts are not available. If you break something, then you throw away the distributor and buy a new one.
8. This reveals the manual advance mechanism. Lube it as per below. I used 10W/40 motor oil and white lithium grease.
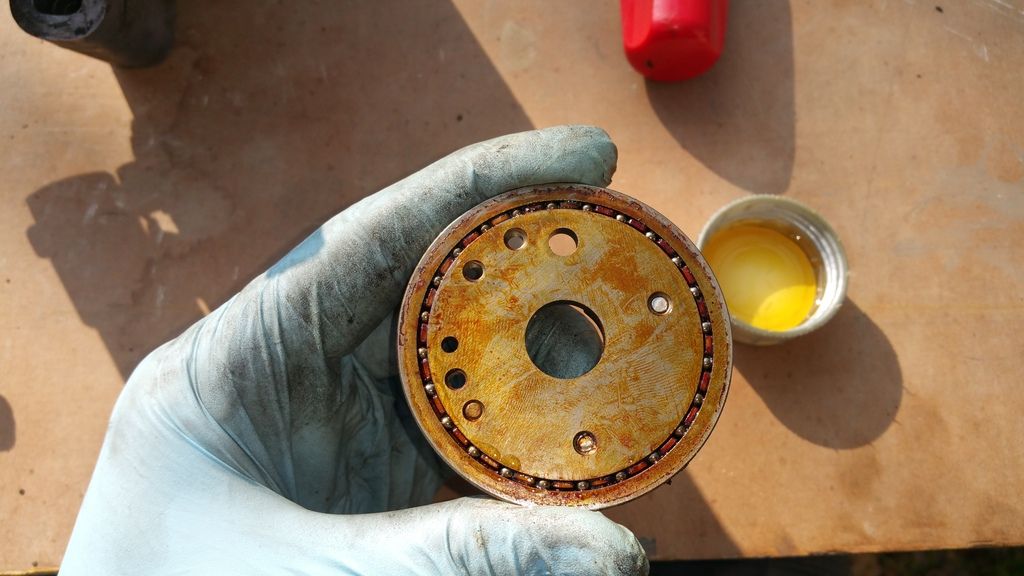
9. Lubricate the ball bearing ring on the vacuum advance plate. I just dribble a little oil over the bearings from the underside and wipe off the excess. The bearings are kept equally spaced by a plastic ring. Be careful with that ring. At this age, it's very fragile. If you break it, the bearings will all move to one side and the plate will be useless.
10. Re-assemble. Per the shop manual, be sure to grease the back of the ICM liberally with silicone (di-electric) grease and pack the connector pins with silicone grease before installing. Install your refreshed distributor, re-time the engine and be happy!
Here are some additional notes and tips.
- It's always a good idea to inspect as much as you can while you have stuff apart. Use this opportunity to check the movement of the advance plate. Make sure it's smooth, not chunky. Make sure your vacuum advance pot holds vacuum. Make sure your distributor shaft doesn't wobble. Test the ICM and pickup coil using the tests on p. 24-9 of the FSM (link in my sig below). And so forth.
- It's not a bad idea to replace the distributor oring at this time so you don't end up with a leak later.
This was my 2nd lazy overhaul. I did the first one 40k miles ago. At that time, my advance mechanisms were not working well. The plate was notchy and tight. The weights were sluggish and slow. The first lazy overhaul freed that all up. The electrical peculiarities I noticed at startup were sharply reduced. Throttle uptake from stops was greatly improved. I used to press the gas slightly and then wait for the ignition system to catch up. That went away. The idle and general engine performance was considerably smoother. I'm happy to say that everything was all still working very nicely 40k miles later and I could easily have deferred this 2nd rebuild for a good while longer.
If you're having any problems with your ignition system, I recommend doing this first.
Edit: the ever difficult tach hop was totally eliminated when I replaced the Ignition Control Module.


 Reply With Quote


Bookmarks