
You have a pic of that hood scoop from the otherside?


You have a pic of that hood scoop from the otherside?
And you will know me by the cloud of smoke.
it was made to fit the air cleaner i made for the other carb, i guess it's just extra cooling nowOriginally Posted by mephi

I was thinking of a more top of the hood kind of picture. I want to see what it looks like. Sort of thinking about cutting a hole in mine, since I have already had to modify it with a ball peen hammer to make it clear the carb.
And you will know me by the cloud of smoke.
I have one somewhere, but i'll have to hunt it later on
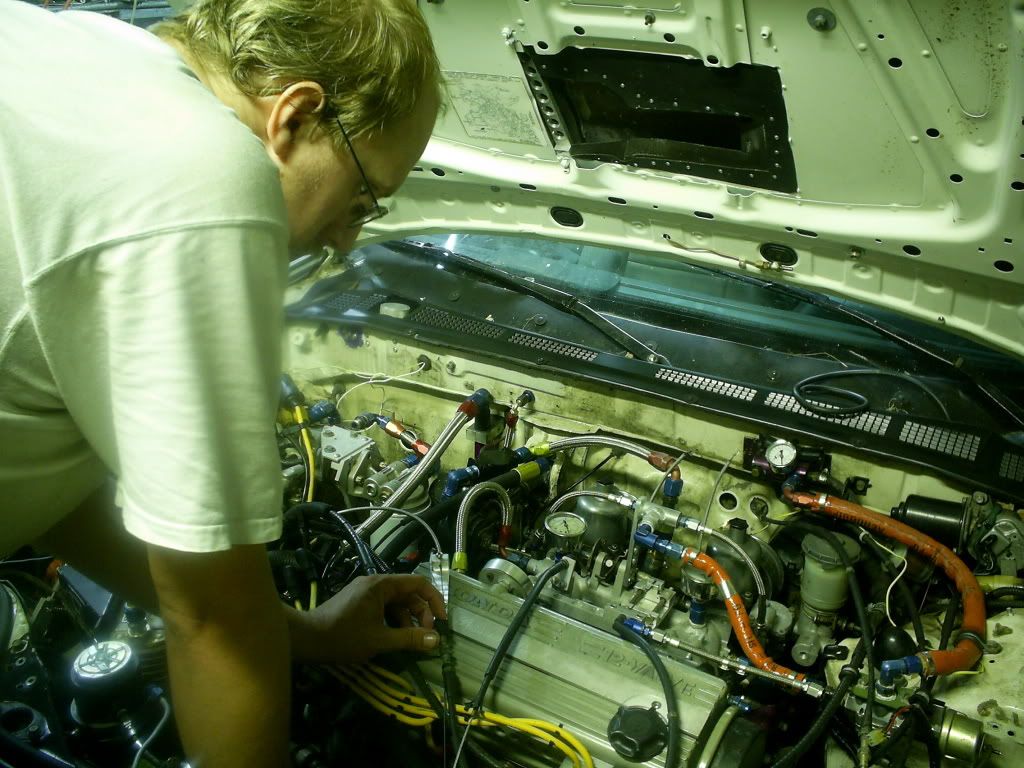
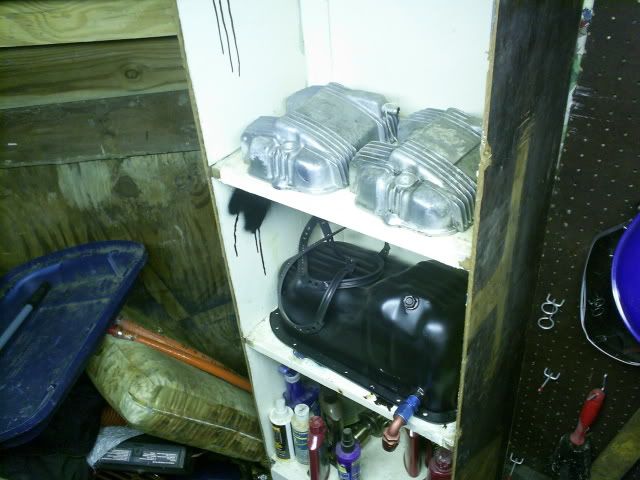
Ok here's the pieces on the dash thats eventually going in the car ,going to be a little while as my bank account melted.
this is the bell crank under the dash, the other rod end is normally attached to the cable that pulls from under the dash. when the choke knob pulls the cable sideways,it changes the motion to pull the cable outward from the firewall.
and this is the actual choke knob itself.
and here's a short video of the entire thing. http://www.youtube.com/watch?v=ALsGBRvwGsU
Last edited by lostforawhile; 08-05-2009 at 07:49 PM.
pimp stuff
1988 Honda Accord LX-i Coupe 123k miles.
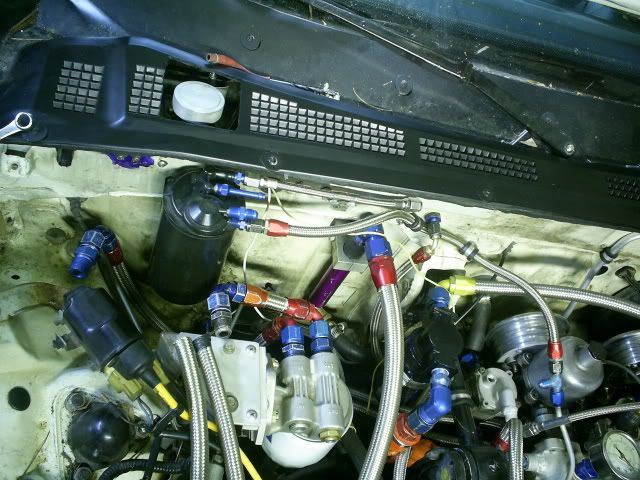
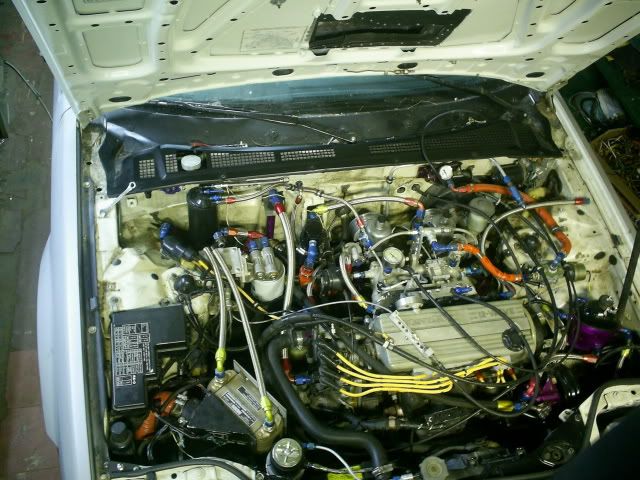
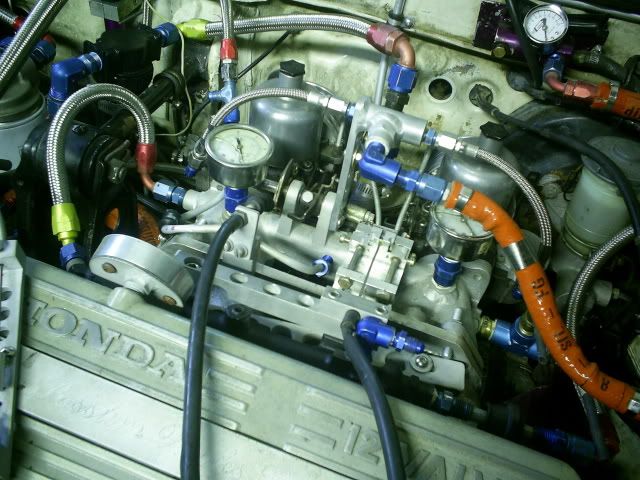
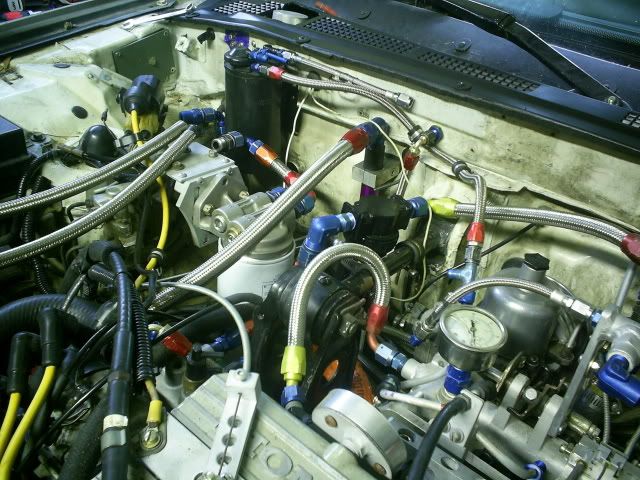
I just put up some more pictures on photobucket mocking up stuff under the hood. http://photobucket.com/newcarphotos I think with the check valve that screws right into the manifold, i might move that upper hose out of the way, then modify the fitting on the booster the same was as the valve. this will let me put the T right on the booster, then i just run the other line to the bulkhead fitting where it runs into the car for the vaccume canister. will look cleaner. i just may move the fuel block over towards the regulator too, this will allow me a straight shot from the firewall to the fuel block and gauge. I'm going to replace all the fuel lines with double wall steel lines anyway, same as original but new. I have all the bending tools, so it should be easy to duplicate. let me find the thread on the check valve.
Last edited by lostforawhile; 08-10-2009 at 11:10 PM.
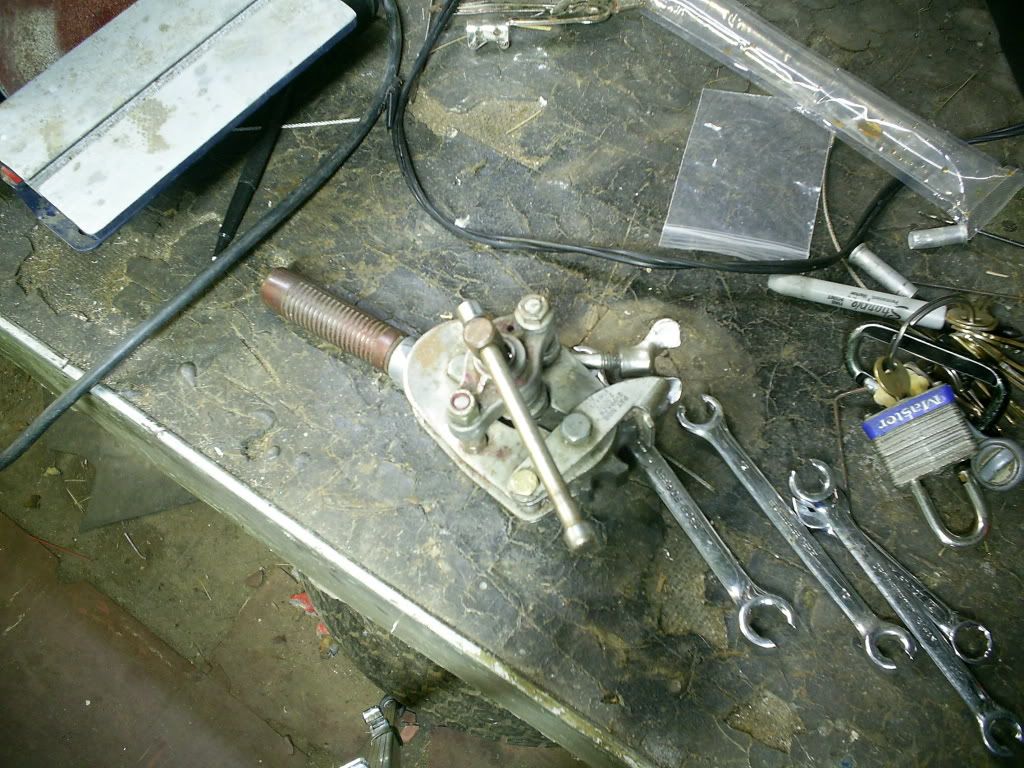
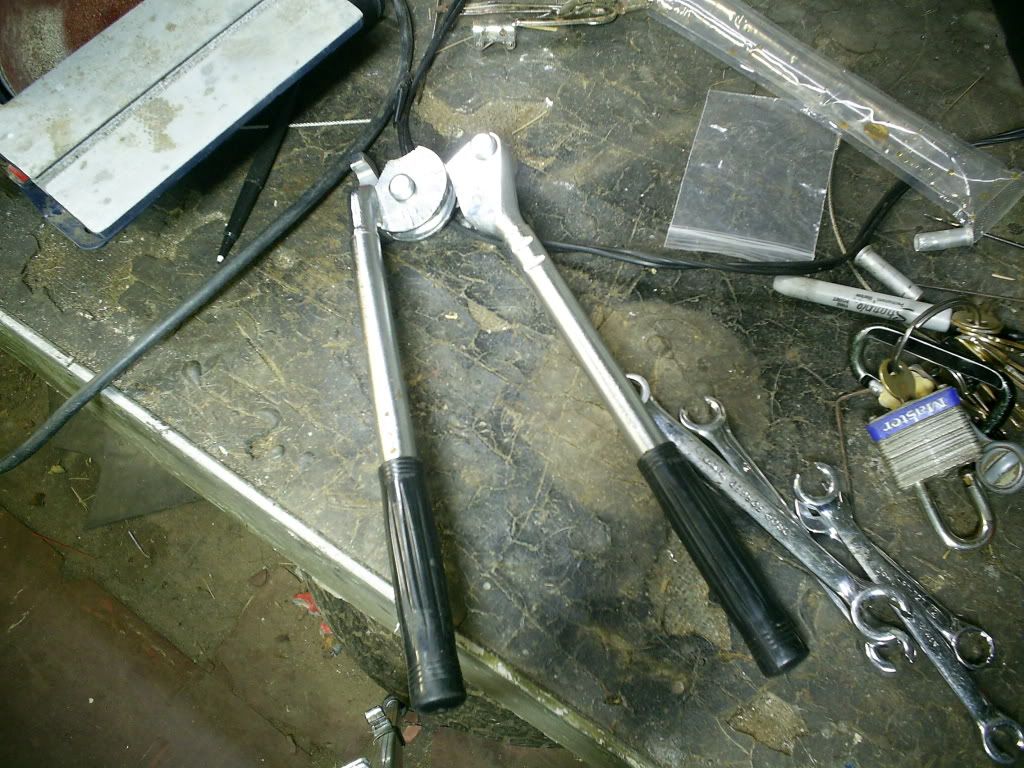
pictures are in the post above, but here are a few tools for bending aluminum line, just made some of the brake booster lines.
tubing bender
AN flaring tool
yep i was right!.... you defiantly have more hoses then a space ship!
1988 Honda Accord LX-i Coupe 123k miles.
here's the link to the check valve thread,
https://www.3geez.com/forum/showthread.php?t=69931
the other pictures are in the link here. http://photobucket.com/newcarphotos
I think with the check valve that screws right into the manifold, i might move that upper hose out of the way, then modify the fitting on the booster the same was as the valve. this will let me put the T right on the booster, then i just run the other line to the bulkhead fitting where it runs into the car for the vaccume canister. will look cleaner. i just may move the fuel block over towards the regulator too, this will allow me a straight shot from the firewall to the fuel block and gauge. I'm going to replace all the fuel lines with double wall steel lines anyway, same as original but new. I have all the bending tools, so it should be easy to duplicate.
dude i really need to come down there and check ur accord out i waan see everything from my eyes when could i come sown ther i lve in charlotte
rhd restoration 2nd gen prelude
i'll talk to my wife, we really don't have any room in the house,but there are a number of hotels around here pretty cheap, it's in my garage in pieces right now because i'm putting it back together, but you are welcome to come down and take a look. i'll just bring all the parts out and explain everything. I'm hoping within the next month to finish putting this wiring back in, getting the used carpet from charlies wrecked coupe, so i want to finish the wiring and put the interior back in, I hate having everything scattered. I did get a large hardware store divided shelf, so i'm putting all the pieces in that inside of the house. Roodoo came down but didn't have much time, I was going to show him a lot more stuff. he did get to look at the manifold off of the car though, it''s now mocked up in the engine bay.
I almost died reading that. I glanced at it before looking opening the link, and sat there in regret when the picture was loading because I thought you said "Anal flaring tool".
bwhahahahahahahahah
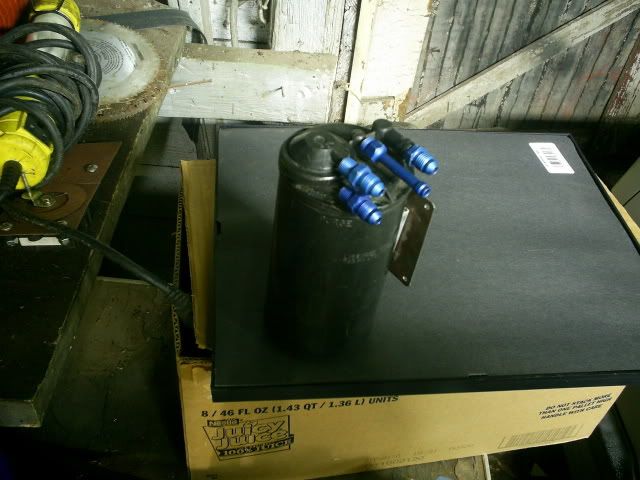
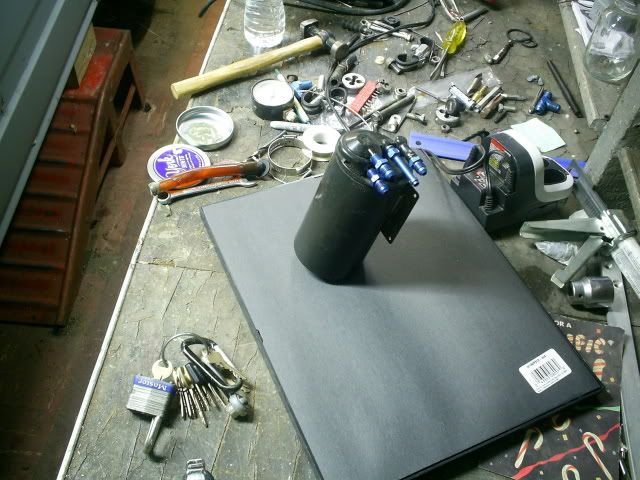
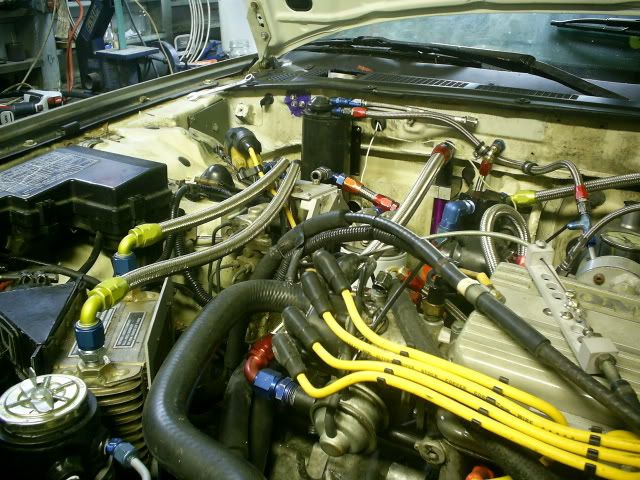
Did a little work on the vapor canister, i hate the rubber hoses off of it, plus it's a different setup and needed to be moved, I'm setting this up with the proper temp controlled vaccume valves so it doesn't purge at the wrong time and make my mixture overly rich. I'm going to use the vaccume setup from an earlier accord, since the keihin carb has special ports i no longer have. The canisters for carbed are all the same though. you have four basic connections, a vapor hose to the carb bowls, a vapor hose to the tank vapor line, (on the firewall) a purge fitting and a vaccume control fitting marked PCV. the first two absorb vapors from the system, the purge goes to your intake manifold for vaccume, and the vaccume valve controls when it purges, this is controlled by the various control thermovalves. to vent the carb bowls, I'm using a vaccume controlled fuel shutoff though a filter to keep from pulling in dirt. when the engine is running vaccume keeps the valve open and atmospheric pressure can reach the fuel in the bowls, when the engine shuts off the valve closes and all vapors and evaporation are absorbed by the canister. i'm plumbing in a check valve too, in case the valve fails, vaccume pulled on the float bowl will open the valve and they can vent . the factory keihin bowl vent does this also, it opens under vaccume, but it has a spring loaded emergency vent built in.
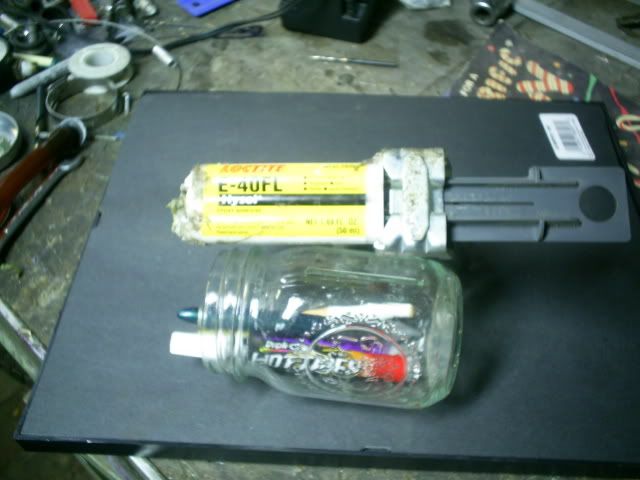
the canister with fittings attached, each AN adaptor was drilled to be a tight fit on each plastic hose connection,the barbs were cut off, i used a high tech epoxy called Hysol ,to seal the fittings to the canister, and to attach them permanently, I would have threaded,but they weren't close to any thread size, this is an extremly tough and flexible Epoxy material, I had some left over from a project before, about 40 bucks a tube, and you need a special gun to dispense it. Tough stuff.
here's the original bracket ,slightly modified to move the canister, I had to pull it off and break the spot welds, looked like a pretzel, took a lot of metal work to save it.
why you need one? lol i trashed mine lulz
1988 Honda Accord LX-i Coupe 123k miles.
because i don't want my car reeking of gas, and thats money evaorating into the air that you could be burning in your engine. anytime you smell raw gas around the car it's money going bye bye
well it fits,finally found somewhere to put it. some people don't use the system,but it's not terribly hard to hook up, and gas is gas, think what would happen if you put a container of gas at 2.75$ out in the yard, it's going to evaporate and you're out 2.75$ same if you leave the gas tank unsealed, or the fuel bowls unsealed. all the canister does is absorb the evaporated fuel vapors, and then purge them back into the engine later, it's the same gas that's in the tank but in a vapor form. I don't mind burning lots of fuel if i'm driving,but i hate wasting gas while the car is sitting.
Last edited by lostforawhile; 08-16-2009 at 10:37 AM.
Could you edit that and put each link on it's own line, por favor?
you must be on dial up
http://i220.photobucket.com/albums/d...e/S4028739.jpg
http://i220.photobucket.com/albums/d...e/S4028737.jpg
http://i220.photobucket.com/albums/d...e/S4028735.jpg
http://i220.photobucket.com/albums/d...e/S4028734.jpg
http://i220.photobucket.com/albums/d...e/S4028730.jpg
http://i220.photobucket.com/albums/d...e/S4028725.jpg[
http://i220.photobucket.com/albums/d...e/S4028724.jpg
http://i220.photobucket.com/albums/d...e/S4028723.jpg
http://i220.photobucket.com/albums/d...e/S4028722.jpg

Nope, all the pics are on the same line. I have to scroll waaaaaaaaayy to the right to see them all. Looks like a lot of fun in your shop though.
Dr_Snooz
"I like to take hammers, and just break stuff, just break stuff." - Beavis
1989 Honda Accord LX-i Coupe, 240k miles, MT swap, rear disc swap
Shop manual downloads available here: CLICK TO VIEW
Damn man, looks like you put a 3g valve cover on a completely different, nitrous fed engine! Kudos on all the work!
see if that's better.i made them smaller before this thread and i don't know why they are sideways,they show up normal for me
Super great now!
Dr_Snooz
"I like to take hammers, and just break stuff, just break stuff." - Beavis
1989 Honda Accord LX-i Coupe, 240k miles, MT swap, rear disc swap
Shop manual downloads available here: CLICK TO VIEW
 Posting Permissions


 Reply With Quote


Bookmarks