Results 1 to 9 of 9

Thread: Anyone Intereted In a Guide

  1. #1
    SEi User gr3k0sLaV's Avatar
    Join Date
    Feb 2002
    Vehicle
    1998 VT Commodore 50th Anniversary Edition
    Location
    Geelong, Australia
    Posts
    1,457

    Anyone Intereted In a Guide

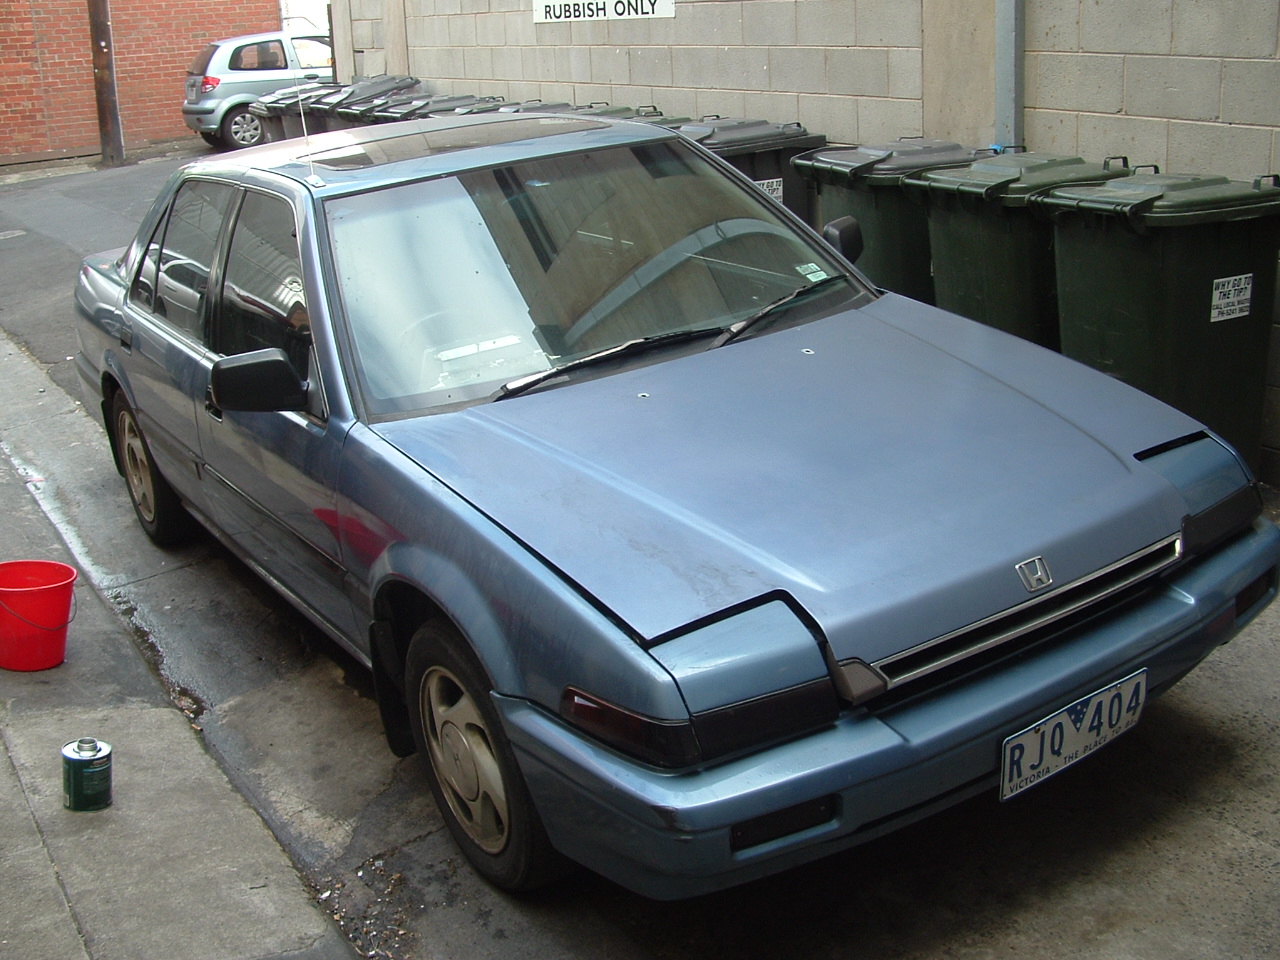
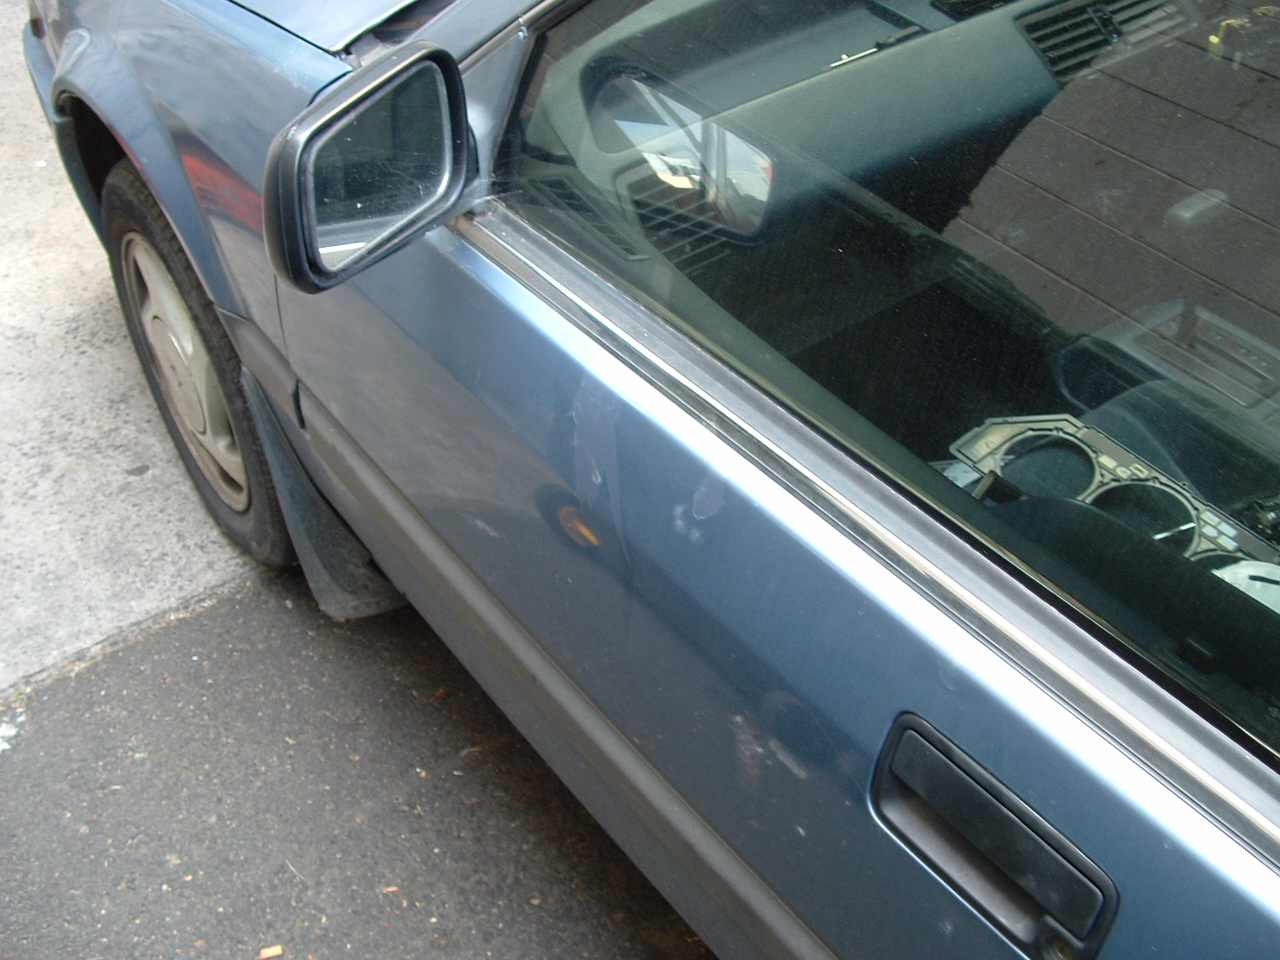
    A blow by blow, photo thread about the repsraying of my Honda?

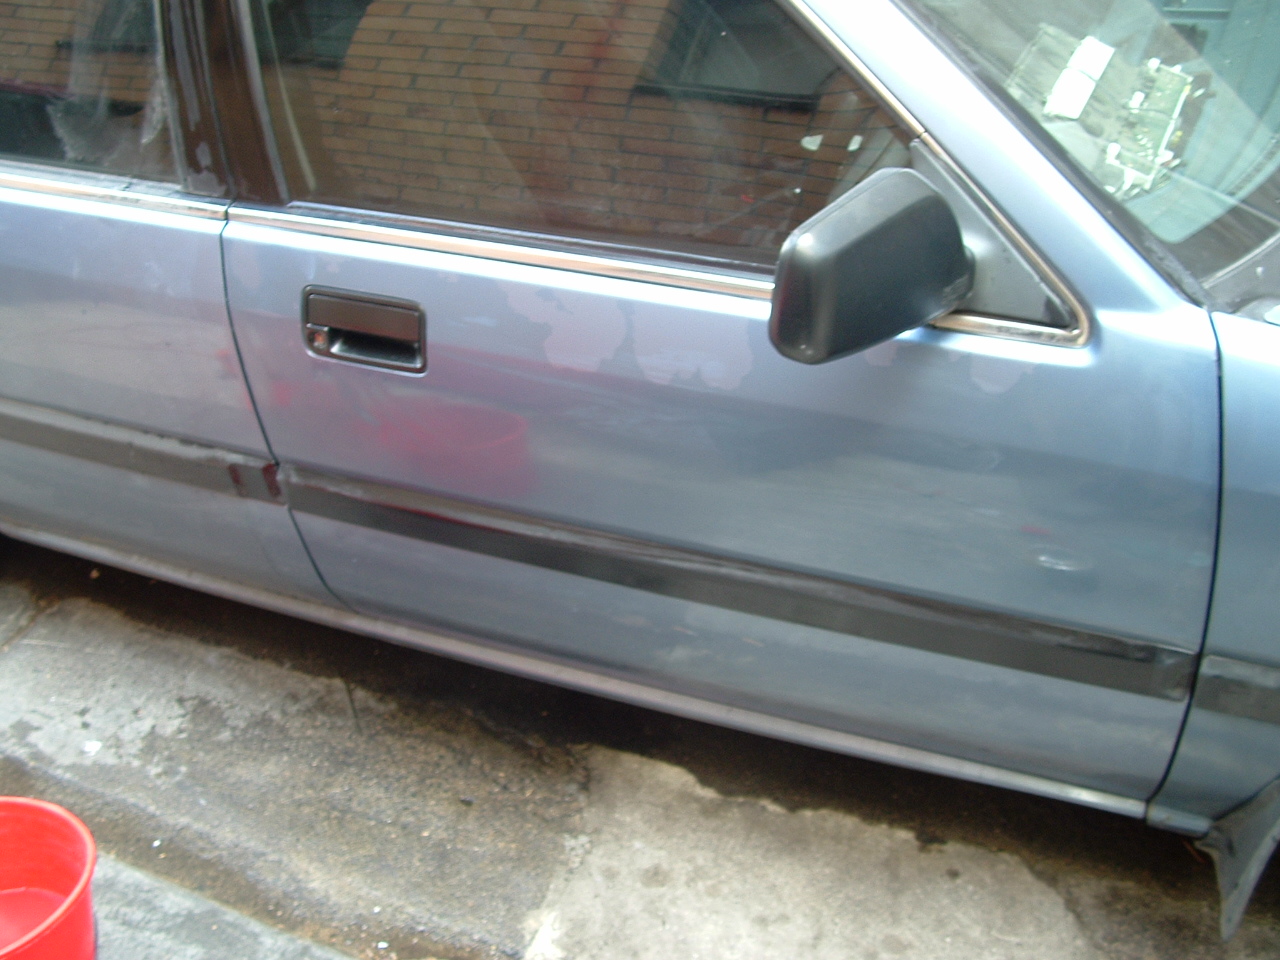
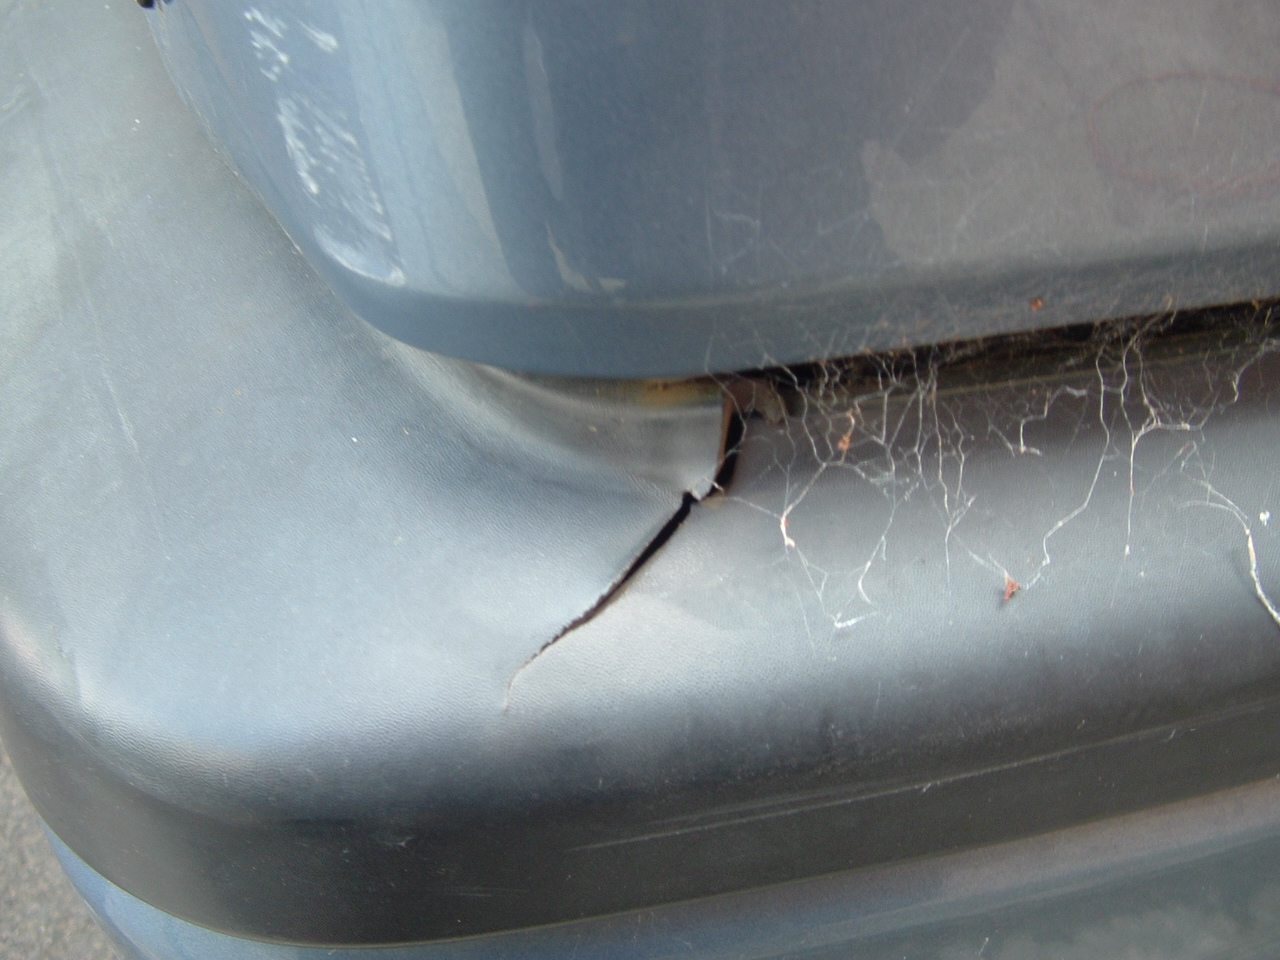
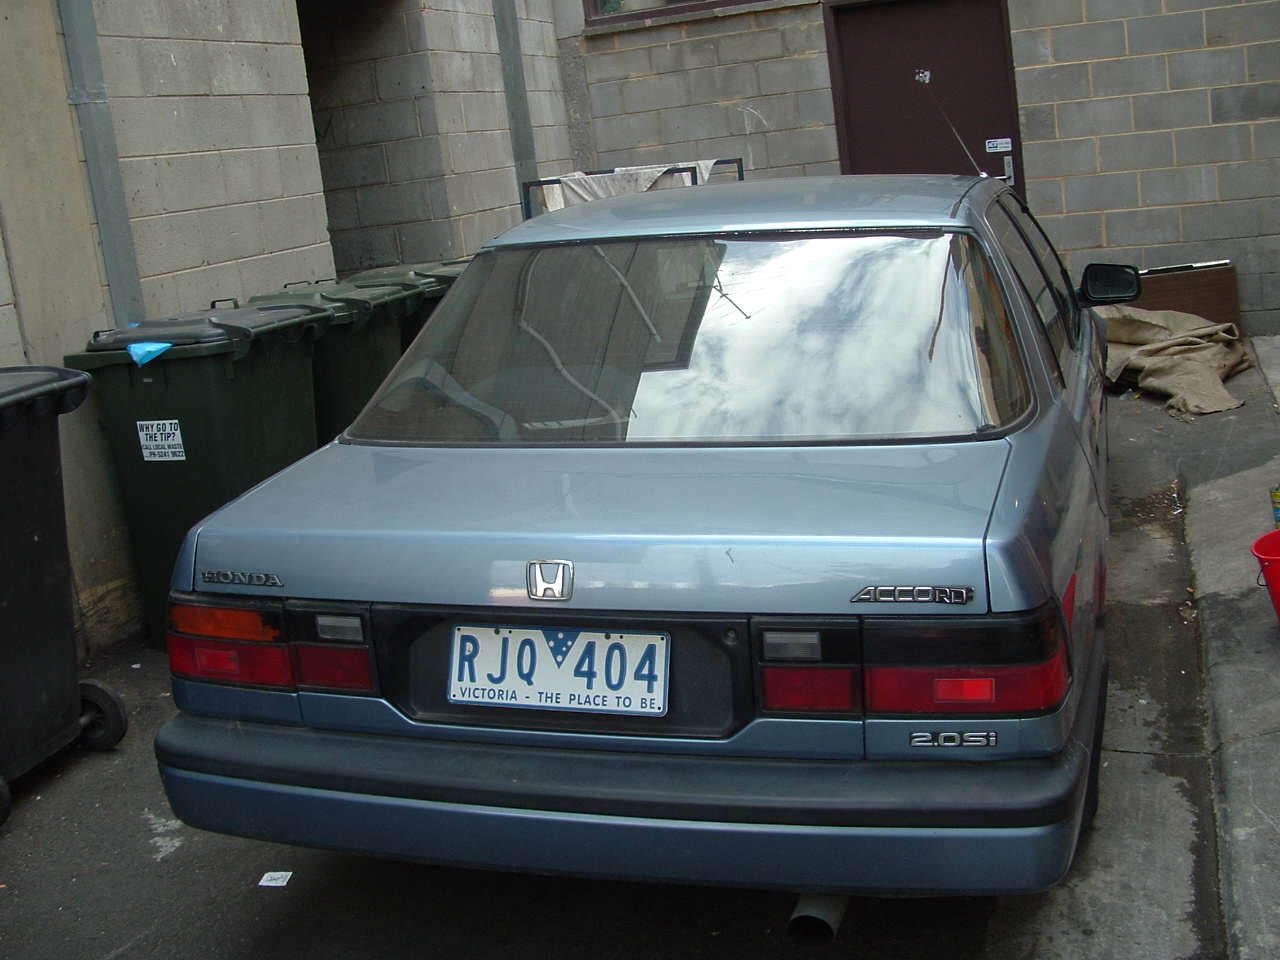
    I'm planning to begin work on the car in the next couple of weeks, the guide will include photo's of the car in its current state, sanding, filling, prep, and finally painting.

    It'll be a big learning curve for me, as i've neverdone any of this before, friends will be helping.

    So far, I'm planning on painting the car with acrylic and in Ford Phantom Purple.
    Cocaine's A Helluva Drug! - Rick James
    I really fracked things up for you Bill - Colonel Tigh
    Girl we couldn't get much Higher! - Light My Fire


  2. #2
    SEi User gr3k0sLaV's Avatar
    Join Date
    Feb 2002
    Vehicle
    1998 VT Commodore 50th Anniversary Edition
    Location
    Geelong, Australia
    Posts
    1,457
    Cocaine's A Helluva Drug! - Rick James
    I really fracked things up for you Bill - Colonel Tigh
    Girl we couldn't get much Higher! - Light My Fire

  3. #3
    LXi User BlueBead's Avatar
    Join Date
    May 2004
    Vehicle
    '87 Carbed Hatch(RIP), 88 FI sedan w/ power group, '73 Jag w/ 350lump
    Location
    Vancouver Island BC
    Posts
    528
    That would be awesome man. Do it; we can always use more How-to's.
    I'm not too sure about the colour purple, but that pic looks pretty good.
    Do up your how-to and I'm sure we can get it made into a sticky for everybody.
    Good luck! I await your posts
    The problem with the gene pool is that there is no lifeguard;
    And the stupid people are breeding......

    http://www.cardomain.com/id/bluebead

  4. #4
    SEi User gr3k0sLaV's Avatar
    Join Date
    Feb 2002
    Vehicle
    1998 VT Commodore 50th Anniversary Edition
    Location
    Geelong, Australia
    Posts
    1,457
    Quote Originally Posted by BlueBead
    That would be awesome man. Do it; we can always use more How-to's.
    I'm not too sure about the colour purple, but that pic looks pretty good.
    Do up your how-to and I'm sure we can get it made into a sticky for everybody.
    Good luck! I await your posts

    Cheers, in the flesh I can assure you the colour looks much better.
    Cocaine's A Helluva Drug! - Rick James
    I really fracked things up for you Bill - Colonel Tigh
    Girl we couldn't get much Higher! - Light My Fire

  5. #5
    SEi User gr3k0sLaV's Avatar
    Join Date
    Feb 2002
    Vehicle
    1998 VT Commodore 50th Anniversary Edition
    Location
    Geelong, Australia
    Posts
    1,457

    ** Large Files **

    Ok today, I sorta began some work.

    Started sanding the drivers door, with wet-rub 600 paper, to take off the shitty clear coat an accident repairer had put on.
    Over time this clear has come off, revealing untouched, original and unprepped paint work underneath.

    So accelerate the process I started ret-rubbing with 80 grit, i'll go over the car once off with wet 80, then re-finish it with 600-800 wet, prior to priming.

    Tonight I spent about 4hrs on it all, I've managed to remove all the trimmings, the door moulding, rubbers, and mirror etc off the drivers door, it took a while, but I figured if i'm going to do a new colour I may as well do it all properly, rather than half assed. I'll do the rest of the car in the next couple of days, now that i know how to do the other doors, it should also be faster.

    One really paint in the ass situation I had involved the driver side window seal, which goes right into the door, I initially removed it, then realised how much of a prick it was to put back on, spent about 0.5-1hr getting it back into place, and I don't want to do that again.

    So pretty much, drivers door is bare, minus the paint. Still alot of sanding to be done on it, then I can mask the glass, and work on the rest.

    Now I have photo's to upload, only catch is the camera ran outta power and these photo's are just taken before I done most of the work.

    Also tomorrow, I need to get a bag, or box and put all the drivers side stuff into there, there's so many little pieces, its effin annoying.

    Other notes
    * I'll be removed all the decals, except the H's.
    * I'll be painting all my mouldings the same colour as the car.
    * I need a new bonnet, lucky I scored one today for $90, the old one was damaged by the dodgy mechanic, well apparently the bonnet flew up and bent when he was driving it, Likely story. So he fixed it, did a shit job, and did a VERY VERY pathetic repsray of it, so well i'll be sending him a bill for a new one.

    -Now things to remember children-

    * Plastics require plastic primer
    * Acrlyic Paints are great for beginners
    * Speak to as many experts as possible
    * Learn all you can
    * Read as much as you can
    * Don't be deterd by negative comments from friends, family, and experts
    * The one above is the biggy. - Stay positive, don't get discouraged, its a f**king big job, but I feel there is more reward in DIY then PSE (Pay Someone Else)

    Anyway enough of my ramblings.


    Cocaine's A Helluva Drug! - Rick James
    I really fracked things up for you Bill - Colonel Tigh
    Girl we couldn't get much Higher! - Light My Fire

  6. #6
    SEi User gr3k0sLaV's Avatar
    Join Date
    Feb 2002
    Vehicle
    1998 VT Commodore 50th Anniversary Edition
    Location
    Geelong, Australia
    Posts
    1,457
    I forgot, firstly, give the car a good clean, wash the body, remove dirt, grime etc. Trust me, there's alot of dirt behind door seals, trimmings, etc. Wash it all, it's evil!

    Also my opinion, prepwash the surfaces prior to sanding, and after sanding, prior to priming.
    Cocaine's A Helluva Drug! - Rick James
    I really fracked things up for you Bill - Colonel Tigh
    Girl we couldn't get much Higher! - Light My Fire

  7. #7
    Accord of the Year - 2009

    thegreatdane's Avatar
    Join Date
    Jan 2003
    Vehicle
    Accord 2.0i-16 '87 - Accord Aerodeck EXi '89
    Location
    Denmark/Europe
    Posts
    2,898
    Props for making a guide based on your own learning process. Good luck with the paint job!


    Link to my 3geez garage
    • Accord 2.0i-16 '87 B20A2 DOHC 16v
    • Accord Aerodeck EXi '89 Exclusive Edition

  8. #8
    SEi User gr3k0sLaV's Avatar
    Join Date
    Feb 2002
    Vehicle
    1998 VT Commodore 50th Anniversary Edition
    Location
    Geelong, Australia
    Posts
    1,457
    I'll post a couple of more detailed pics tonight.

    Now Important bit, is planning. Something I didn't do as well as I thought, I need to go and get some boxes and bags so I can nicely orgnise everything.

    Currently like an idiot, I just have all the door trim bits, several different pieces in fact for the drivers door alone strewn across the back seat, this is only going to get worse once all the other doors are stripped down.

    I advise anyone who's doing this, to stick it all in a box of some description, label it, and organise it, and put it away safely.


    Another tip with the rubber seal surrounded the doors, when removing this, be extra careful. The seal is held in place with little oval shaped plastic bits that go into the seal, if you rip the seal out, chances are you'll wreck the holes, possibly meaning you'll need to spend money on new seals, this is just wasteful if your seals are still good.

    I just careful used a set of needlenosed pliers and careful removed each plastic bit from the door.

    As promised ill post some pictures in 12hrs time.
    Cocaine's A Helluva Drug! - Rick James
    I really fracked things up for you Bill - Colonel Tigh
    Girl we couldn't get much Higher! - Light My Fire

  9. #9
    SEi User gr3k0sLaV's Avatar
    Join Date
    Feb 2002
    Vehicle
    1998 VT Commodore 50th Anniversary Edition
    Location
    Geelong, Australia
    Posts
    1,457
    A little update, sorry no pics, haven't had time to get batteries for the digicam.

    I've currently paused the sanding, as I've dedicated myself to stripping off the door trimmings.

    I've unintenionally ended up removed the glass from the rear passenger doors, but leaving it in the front doors. So far pretty much both drivers and rear drivers side are fully stripped, leaving just the bare minimals.

    All i just need is someone to tell me an easy way to remove the door latches.
    Cocaine's A Helluva Drug! - Rick James
    I really fracked things up for you Bill - Colonel Tigh
    Girl we couldn't get much Higher! - Light My Fire

Similar Threads

  1. 3G buying guide?
    By Edison Carasio in forum Classic Honda Community Chat
    Replies: 5
    Last Post: 01-05-2010, 08:27 AM
  2. Dashboard Guide Pin
    By speedpenguin in forum 3geez Accords
    Replies: 9
    Last Post: 04-17-2006, 12:04 PM
  3. Replies: 12
    Last Post: 09-08-2003, 10:13 AM
  4. Turbo documentation/guide??
    By NXRacer in forum Classic Honda Community Chat
    Replies: 1
    Last Post: 06-19-2003, 07:37 AM
  5. Header guide
    By OldSchoolSwap in forum Performance
    Replies: 9
    Last Post: 04-23-2003, 09:28 AM

Bookmarks

Bookmarks

Posting Permissions

  • You may not post new threads
  • You may not post replies
  • You may not post attachments
  • You may not edit your posts
  •  
This website uses cookies
We use cookies to store session information to facilitate remembering your login information, to allow you to save website preferences, to personalise content and ads, to provide social media features and to analyse our traffic. We also share information about your use of our site with our social media, advertising and analytics partners.
     
Links monetized by VigLink