


AUTOMOTIVE PHOTOGRAPHY
This guide will follow through a few concepts which are key to taking good photographs in general, but more specifically... pictures of our cars. The first section is on basic composition, as anyone with a point-and-shoot can at least aim properly. The second section is for those lucky enough to have a dSLR or at least an advanced P&S. The final section is a walkthrough on some tips and tricks for post-processing in Adobe PhotoShop.
COMPOSITION
Location
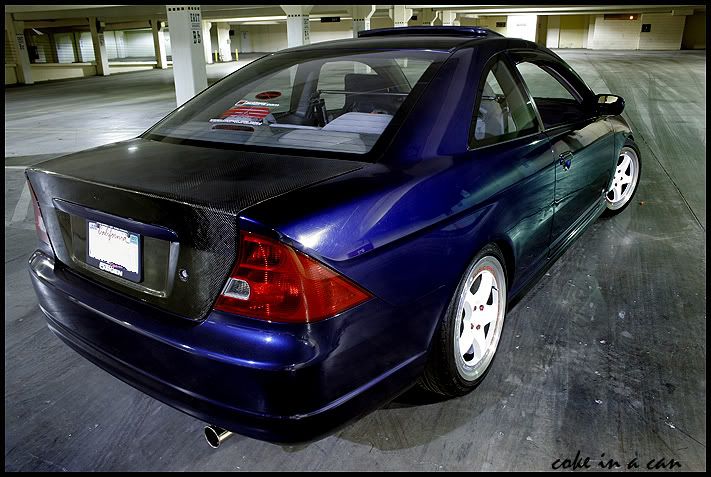
The first thing you need to consider is location. Never take a picture of your car with a busy background. It should always be something neutral, or at least something that draws your attention to the car. Tunnels, forests/trees, parking garages or an alleyway are popular choices among amatuers as well as the magazines.
Next, position your car at an angle you like (obviously move yourself as well as the car for more shots) and angle the front wheels so that the wheel is facing you, not the tire tread.
The Rule of Thirds
This is a big one. When viewing a photograph, imagine making it a grid of 9 sections... basically... cutting in 3rds top to bottom and left to right. You always want to place the subject on one of these imaginary lines.... NEVER, EVER IN THE MIDDLE. It leads to a more interesting visual setup and will instantly make you look like you know what the heck you're doing. Some things to make note of... always leave the empty space in front of the car. It's your choice to have the car in the top 3rd or the bottom 3rd, but always have the extra space in front. This concept is called "walking room" or "leading the subject" (in video). However, in some cases its OK to center one of the two axis - but always have at least one at a 3rd.
Lighting
SUNRISE/SUNSET. This should be the only two words in this segment, but I feel the need to elaborate slightly. Sunrise and sunset provide the best lighting. Period. Here's an example of a car shot during broad daylight followed by a professional shot of a car at sunset.
Get it?
Now that we've established when you're taking your photos, how about where to stand. Take a look at this diagram I made as the following explanation will make more sense.
Generally keep the sun at your back and slightly to one side or the other. Now - you want the broad side of the car (the side you see) to have the light hitting it. Beyond that - move around to get interesting reflections on your paintjob or interesting angles of the car and it's background.
Night time and indirect light (parking garages)
When shooting at night or in a parking garage, light is coming from many different places. Simply try and position yourself and the car in such a way that the most light is hitting it from the direction behind you and to one side. Sillhouetting may occur in some lighting situations, but that may be OK... just remember we want to see your car, not it's outline.
Angle
The best way to describe good angles is to give some examples. Try getting as close to a corner as you can while still seeing the entire car. Look down from a balcony. Shoot straight at it. Experiment. Now of course all of these rules can be bent or broken and have stunning results, but try and grasp the foundation before trying to get too funky.


 Reply With Quote


Bookmarks